Cooking deer meat for canning without a pressure cooker
Have you ever wanted to preserve deer meat, but don’t have a pressure cooker? It can be a daunting task to safely can meat without one. However, it is possible to do so with a few extra steps.
Canning is an excellent way to preserve meat, especially when you have a large quantity. However, it requires a pressure cooker to ensure that the meat is cooked at the correct temperature and pressure to eliminate any harmful bacteria. But not everyone has access to a pressure cooker, which can make the canning process seem impossible.
If you’re a deer hunter or have access to a large quantity of deer meat, you may want to consider canning it for later use. While a pressure cooker is the recommended method for canning meat, it’s not the only way. In this article, we’ll discuss how to safely can deer meat without a pressure cooker. With the right techniques and precautions, you can enjoy your canned deer meat for months to come.
Why should I can deer meat?
Canning deer meat is a great way to preserve your venison for later use. By canning your meat, you can have it readily available for a quick meal without worrying about taking up valuable freezer space. Canning also helps to tenderize the meat and remove some of the gamey flavor that is often present in wild game.
One of the key benefits of canning deer meat is that it allows you to preserve low-acid foods safely without the use of a pressure canner. While pressure canners are recommended for canning low-acid foods like meat, you can also use a water bath canner to can your deer meat. With a water bath canner, you can achieve the proper temperature needed to kill any harmful bacteria present in the meat.
When canning deer meat, it is important to start with fresh meat. You will want to brown the meat in a pan and then pack it tightly into a canning jar. Be sure to leave about an inch of headspace at the top of the jar to allow for expansion during the canning process.
What are the benefits of canning deer meat?
Canning deer meat has many benefits. First, it allows for long-term preservation of the meat without the need for refrigeration or freezing. This makes it ideal for outdoor enthusiasts who may not have access to refrigeration while camping or hunting.
Canning also helps to retain the nutritional value of the meat, as well as its flavor and texture. It also allows for easy and convenient meal preparation, as canned meat can be quickly added to soups, stews, and other dishes. Finally, canning deer meat is a great way to reduce waste and make use of all parts of the animal, ensuring that nothing goes to waste.
– Canned venison provides you with a quick meal solution. It is convenient to have a jar of cooked meat readily available for a variety of recipes.
– Canning deer meat allows for the preservation of gamey flavored wild meats, which will take on a new and more pleasant flavor during the canning process.
– Canning meat also frees up freezer space for other food items. You can store canned venison on a shelf in your pantry or cupboard.
– With a water bath canner, you don’t need to invest in a pressure canner, which can be a more expensive piece of equipment.
– Canning deer meat without a pressure cooker also reduces the risk of overcooking and making the meat tough.
– You can control the amount of seasoning in your canned venison to suit your taste preferences.
– The canning process removes air pockets and ensures that canned meat has a long shelf life of up to 1-2 years when stored in a cool, dry place.
– Canned meat is also an excellent option for outdoor enthusiasts who want to bring along a nutritious and fulfilling meal on camping, hunting, or fishing trips.
How to Can Deer Meat without a Pressure Cooker
Canning deer meat is a great way to store it for a prolonged period without losing its taste and texture. If you do not have a pressure canner, you can still get the job done. Here is a step-by-step guide on how to can deer meat without a pressure cooker.
Step 1: Select fresh, high-quality venison to can. Ensure that the meat is free of any spoilage signs such as foul odor or discolored patches.
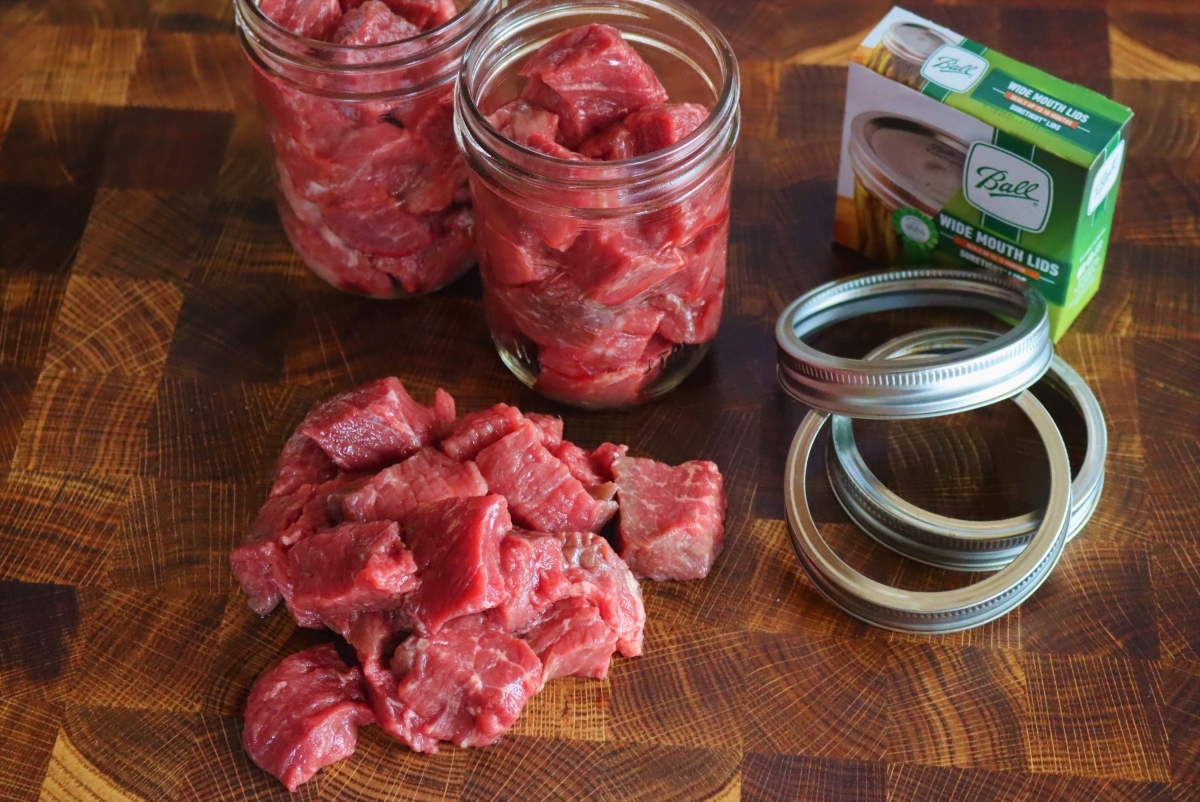
Step 2: Trim off any silver skin, fat, or gristle from the meat. Cut it into small, evenly-sized pieces that fit your canning jars.
Step 3: Prepare a brine solution to enhance the meat’s flavor and tenderize it. Dissolve half a cup of salt per quart of water in a large container. Add the meat to the solution, making sure it is fully submerged and let it soak for at least an hour. Drain off the brine and rinse the meat thoroughly in cold water.
Step 4: Cook the meat before canning. Brown it in a large skillet until no longer pink or boil it until fully cooked.
Step 5: Add ½ teaspoon of salt and ¼ teaspoon of black pepper to each pint-sized jar and 1 teaspoon of salt and ½ teaspoon of pepper to each quart-sized jar. Add other seasonings or spices as per your preference.
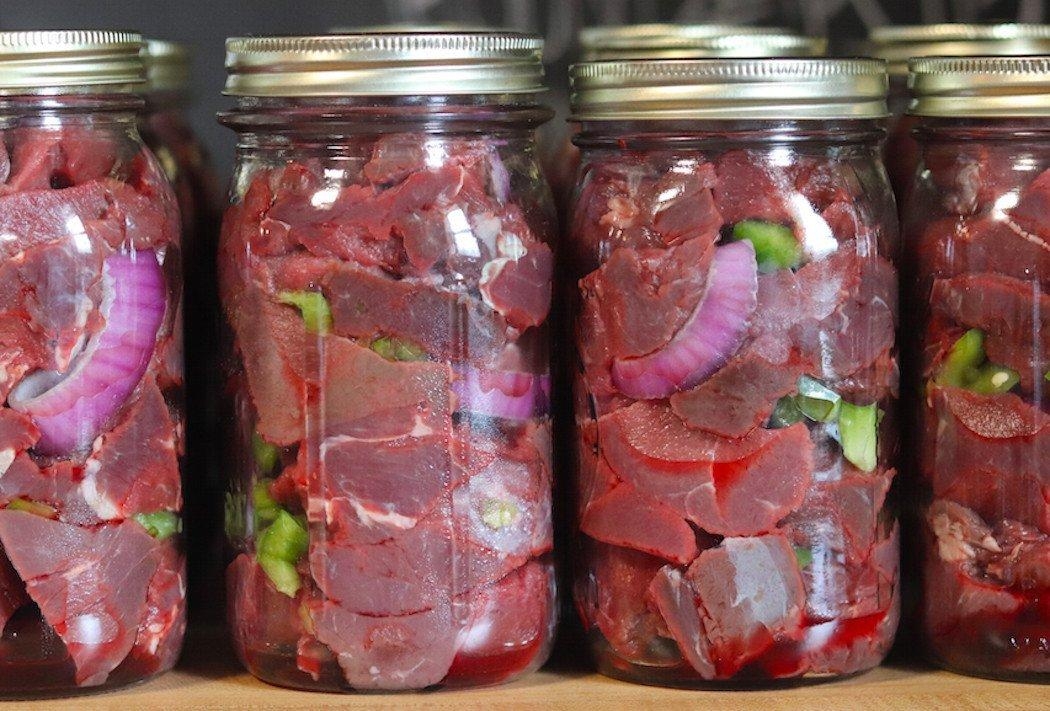
Step 6: Fill each jar with hot meat, leaving a 1-inch headspace at the top. Add hot tomato juice or water to the jars, ensuring proper headspace.
Step 7: Remove any air bubbles using a wooden spoon or other utensil. Wipe the rims of the jars with a damp, clean cloth to remove any food particles. Place a lid and a band onto each jar, tightening the band enough to hold the lid in place.
Step 8: Place the jars into a water bath canner, ensuring they are fully immersed. Bring the water to a gentle boil and let the jars process for 75-90 minutes depending on your altitude, jar size, and meat type.
Step 9: Once the processing time is complete, use a jar lifter to lift the jars out of the canner and place them on a towel or rack to cool. Avoid moving or touching the jars or lids during the cooling process. You will hear a pop sound indicating the formation of a tight seal while they cool.
Considerations When Canning Deer Meat Without a Pressure Cooker
Canning deer meat without a pressure cooker can be done, but there are some important considerations that need to be taken into account. If you don’t do these things correctly, the meat may not be safe to eat, or it may not taste as good as it could. Here are some things to consider when canning deer meat without a pressure cooker:
1. The type of deer meat you use matters:
The type of deer meat you use can make a big difference in how it tastes after it has been canned. Gamey-flavored wild meats, such as deer and elk, benefit from being soaked in a brine solution before cooking. This solution can be made by dissolving half a cup of salt per quart of water in a large container. Add the meat to the solution, making sure it is fully submerged and let it soak for an hour. Afterward, rinse the meat thoroughly in cold water. This process will enhance the flavor and tenderize the meat.
2. Meat preparation:
Before canning, ensure that the meat is free from any spoilage signs. If there are any discolored patches or it has a foul odor, discard the meat. Also, remove any silver skin, fat, or gristle from the meat. Cut it into small, evenly-sized pieces that fit your canning jars.
3. Seasoning:
Add the seasoning to the meat as per your preference. For each pint-sized jar, add ½ teaspoon of salt and ¼ teaspoon of black pepper, and 1 teaspoon of salt and ½ teaspoon of pepper to each quart-sized jar.
4. Head space:
Ensure that you leave a 1-inch headspace at the top of each jar. This space is crucial to allow for expansion of the contents during canning without the jar bursting.
5. Choose the right jars:
Use clean, pint-sized jars instead of quart-sized jars. Pint-sized jars are preferred for canning low-acid foods such as meat because they heat up faster and cool down more quickly. You can use quart jars, but be sure to add an additional 10 minutes of processing time per pint.
6. Water bath canning:
In the absence of a pressure canner, you will need to use a water bath canner for processing the deer meat. A water bath canner is a large pot or deep cooking vessel with a rack that allows water to circulate around the jars. There should be enough water in the canner to cover the jars by at least 1 inch. Bring the water to a gentle boil, then add the jars to the canner, ensuring they are fully immersed.
7. Processing time:
The processing time for canned meat depends on your altitude, jar size, and meat type. However, for deer meat in a pint jar, it’s recommended to process it for 75-90 minutes. Make sure you refer to a reliable canning resource for the correct processing time for the altitude at which you live.
8. Cool down:
Once the processing time is over, switch off the heat and use a jar lifter to lift the jars out of the canner. Place the jars on a towel or rack to cool. Avoid moving or touching the jars or lids during the cooling process. You will hear a popping sound indicating the formation of a tight seal while the jars cool. Also, do not tighten the band excessively, as this can prevent air from escaping.
Canning deer meat without a pressure cooker is possible, but it requires some extra effort. By following these considerations, you can ensure that your canned venison is safe to eat and tastes delicious.
Meet Jaxon Monroe, the culinary enthusiast and food blogger who has taken the online cooking world by storm with his passion for experimenting with flavors. With a sharp eye for detail and an innate ability to create and present dishes in an appealing way, Jaxon’s blog is the go-to for any food lover seeking inspiration.
From BBQ chicken pizza bites to healthy Thai spiced salmon cakes, Jaxon’s recipes draw upon a range of cuisines and flavors, each as tantalizing as the last. But it’s not just about indulgence – Jaxon also shares tips and tricks to help readers improve their cooking skills.
Whether you’re an experienced cook or just starting out, Jaxon’s blog offers valuable insights and creative ideas that will leave you inspired in the kitchen. So why not join the thousands of readers who have already discovered the magic of Jaxon Monroe’s unique take on cooking?